

 Posts
Posts


If you are new to the advanced modes of an SLR, I would strongly suggest trying out the tutorial mentioned above in Program Mode first.
Aperture Priority, as discussed in Aperture Priority Mode, allows you to take control of the aperture (f number) with the camera adjusting the shutter speed accordingly. If aperture has had you stumped then hopefully this article will help you understand it more. Aperture Priority was originally my favourite mode before turning to Manual.
Take a look at my previous article on using Program Mode and pay attention to the photos showing apertures f2, f10 and f22. The photos give you an understanding of what aperture is about and how changing the f number changes the amount that is in focus.
A smaller f number (large aperture) allows more light in but only a small area (where the focus is placed) is in focus. A larger f number (small aperture) decreases the amount of light allowed in but more of the photo is in focus.
This article will help with the more technical side: http://digital-photography-school.com/aperture/
For this tutorial I'm going to be working on a photo indoors for a low light example and outdoors. Give both a try to get a feel of how shutter speed, aperture and ISO work together.
Aperture Priority Quick Tutorial
1. Switch the camera on and turn the mode dial to A. Take note of the f number at the bottom. You will be able to change this using the Jog Dial on the top of your camera. Turning the wheel to the left decreases the f number (opening the lens up) and turning to the right increases the f number (closing down the lens). The f number must remain in the colour blue for correct exposure, if red the camera won't take a photo.
2. Check the settings. Have a look at Tutorial In Program Mode for the settings and explanations. I have kept my settings the same as for Program Mode.
3. Indoor photo - the amount of light e.g. near a window, will determine the shutter speed and the ISO if you specifically want a certain aperture. As it is currently going into Winter in South Africa, my work room isn't getting as much light as usual.
I chose the largest aperture for my Samsung 30mm, which is f2, for the camera photo. The largest apertures for the following Samsung lenses: 18-55mm is f3.5, 20mm is f2.8, 20-50mm is f3.5, 50-200mm is f4.
So whichever lens you have, turn the Jog Dial to the left until you get to the smallest f number (largest aperture). We are going to start from here.
4. Half press the shutter button to focus and take a look at the shutter speed. The camera will meter and adjust the shutter speed according to the aperture you chose and the amount of light available. If the shutter speed is below 1/30 then you will need to boost up your ISO. You can always just change the aperture but you should practice with different apertures, starting at the largest, to get an understanding of how this works.
5. If your shutter speed is below 1/30, then press the Fn button and use the navigations buttons to move the blue outline to select ISO. Click OK (or touch the screen) and use the navigation button on the right (AF button) to select a higher ISO. If you started with ISO 100, increase to 200 and see if this has improved your speed (it should have doubled or around there). If ISO 200 is not enough increase to 400 and so on. You want to get the shutter speed to around 1/50 or more but be careful of pushing your ISO unnecessarily high. Press Ok once you have selected your ISO.
Another thing to note, the further the subject/object is away from the focus area the more blurred it will be and anything at the same distance will be in focus.
In my test shot, because of the light, the shutter speed for f2 was at 1/15 with ISO 100. I increased my ISO to 400 which pushed the shutter speed up to 1/60 while keeping my aperture at f2.

The focus was placed at the top and anything level with the focus was also in focus. The background was blurred out at f2.
6. Now increase your aperture (f number) to f10. In low light you will immediately see the shutter speed slow down greatly. You can see from my test shots below that I to use a tripod and timer. To use the timer, press the left navigation button to select the Driver and then use the navigation button on the right to move the selection box to Timer. To change the length of time, press the DISP (top navigation button) to change. Once done press OK.
When you have selected focus and press the shutter button down to take a photo, step back and let the timer do its work.
In the photo below, when I selected f10, ISO 400, the shutter speed slowed down to 0.4" (4 seconds). At ISO 800, shutter speed was 1/5 and so on. I increased my ISO to 6400 which gave a shutter speed of 1/40 at f10. Just enough for handheld but as shown below, the noise became evident.

I used a tripod here (you can use anything that provides stability, even a box), decreased my ISO down to 400, set the timer to 5 seconds and took the shot. I focused on the same area as in f2. You can see that the background is less blurred and the object (the purple candle) behind the camera is also more in focus.
7. Change your aperture to f22, the shutter speed should slow down even further than f10 at the same ISO. Choosing f22 decreased the amount of light allowed in so much that at ISO 400 the shutter speed was 2 seconds. That might not sound slow but is too slow for handheld and definitely slower than 0.4 seconds. I had to use a tripod or risk extremely high ISO and noise and even then the speed wouldn't haven't been fast enough for handheld.
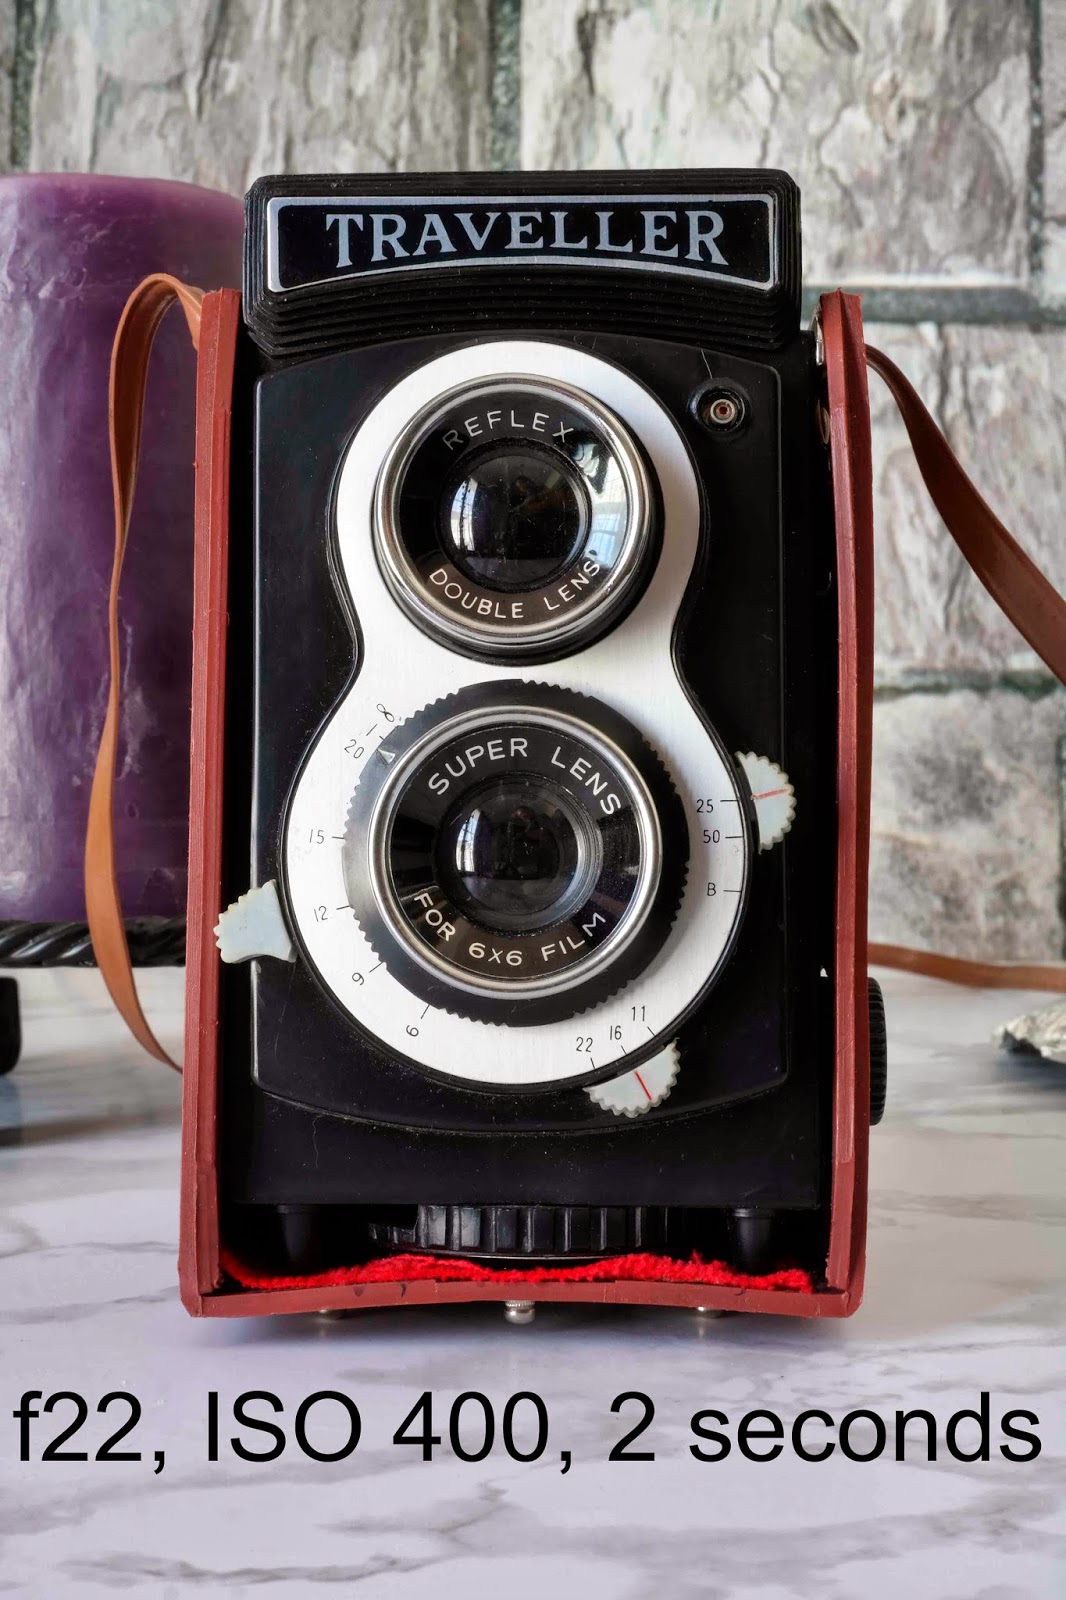
Front to back the photo is sharp in comparison to f2.
That's it for the indoors photos. The less light you have the slower the shutter speed depending on what your aperture is.
Next, outdoor photos test shots.
The steps I followed are the same as above. As I had more light outside I didn't have to increase my ISO drastically but I did have to go as high as 1600 for f22 because I was in the shade.
So start out with the your largest aperture (smallest f number) and increase your ISO accordingly. If your ISO has to go higher than 1600 to get a shutter speed of 1/30 and over, then use a tripod and decrease your ISO down to around 400. Use the timer on your NX300. If there is wind outside and the object/subject is light then you will have blurring if the wind causes the object to move e.g. a flower will move with the wind and you will need a faster shutter speed of about 1/80.

When you change your aperture to a bigger f number (smaller aperture) you might not see a difference in comparison to a larger aperture on the screen. To see what will be in focus and what will be blurred before taking a photo, press the Delete button. This button can be customised but factory settings should be set to Depth of Field.
The photo example below is just to show how the amount of light changes shutter and ISO when the aperture is f22. Same day, same time (morning) as above outdoor photos but more in the path of the sun.

Here the ISO was 400, shutter speed 1/40 in sunlight whereas the previous photo was taken in the shade causing ISO to increase to 1600 just to get a shutter speed of 1/30.
Now, let's have a quick look at angle. With the photos above, the shots were taken straight on. As said, anything at the same distance of the area focused will also be in focus.
Both photos were taken with the following settings: f2, ISO 400, 1/80 shutter speed. The only difference is the angle, which shows that the further away something is from the focus area the more it will blur. The focus was also placed in exactly the same area.

The photo isn't 100% straight on as you can see. The right side is more blurred than the left, the bottom sharper than the top. So I was at a bit of an angle lol.

Here I positioned the Samsung NX300 slightly higher, looking down on the camera. The lower part of the camera was further away than the focused area because of the angle and so is out of focus.
If I had used f22, then the bottom half would have been sharper and clearer (although might have shown a slight blur). Also, changing angle can change how the light hits the object/subject and increase/decrease your shutter speed.
When to use a large aperture (small f number) and small aperture (large f number)? Anytime, anywhere although a larger aperture (small f number) is more beneficial for low light scenes because it pulls in more light but less will be in focus.
There isn't a rule that says you must use this setting for that scene and so on. If you want the attention on something specific then use a larger aperture (small f number) like f2. If you want focus front to back then start with f8 and work up. Always keep a check on the shutter speed, a steady hand can get away with a slower shutter speed to a point and if you intend on trying handheld use continuous shooting.
Depth of field (how much is in focus) is a matter of taste and playing around with the aperture will help you understand how it all works.


